-
Gujarat, India
- info@icontechnology.in
- 24/7 Customer Support
Gujarat, India
Barcodes are black and white lines with numbers that help you identify products quickly. Many businesses use them to save time, reduce errors, and manage inventory more efficiently. With the right tools, it’s easy to create barcode in Odoo and make your daily operations smoother.
Odoo 18 comes with a built-in barcode feature that makes it simple to track products, scan items, and print barcode labels. You don’t need to be a tech expert — just follow a few easy steps, and you’ll be ready to use barcodes in your Odoo system.
In this blog, we will show you how to create barcode in Odoo 18, step by step. This will help you speed up your work and keep your product records more accurate.
Before you can use barcodes in Odoo 18, you need to install the right modules. These modules help Odoo understand and work with barcodes.
After installing the modules, you need to turn on the barcode feature in your settings. This allows you to use barcodes in your inventory system.
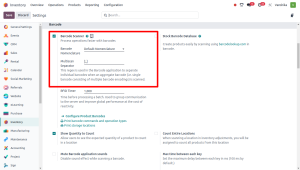
Now the barcode feature is turned on in your Odoo system, and you’re ready to add barcodes to your products.
Inventory adjustment means checking the real stock in your warehouse and comparing it with what’s shown in Odoo. This helps make sure your records are correct and prevents stock errors.
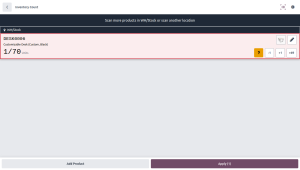
Warehouse managers usually give counting tasks to staff. These staff members go to specific areas, scan product barcodes, and change the quantity if it’s different from what’s in the system.
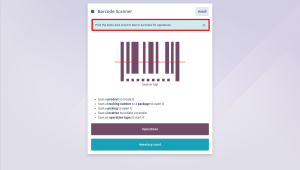
Odoo’s Barcode app also comes with demo barcodes you can use for practice or testing. You can print these demo barcodes from the app’s home screen.
Before starting a stock count, managers can assign specific products and locations to employees.
Steps to Assign a Count:
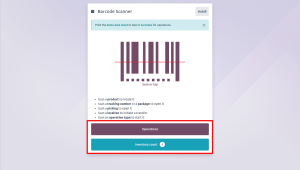
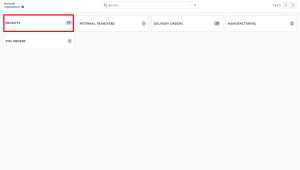
Once assigned, employees will see their counting tasks in the Barcode app. On the dashboard, the Inventory Count button will show how many products need to be counted.
To perform an inventory adjustment follow these steps:
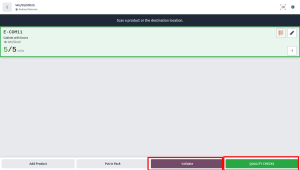
The Barcode app can be used to process receipts, deliveries, and other types of operations in real time using a barcode scanner or the Odoo mobile app.
This makes it possible to process operations on the warehouse floor when they happen, instead of having to wait to validate transfers from a computer. Processing operations this way can help to properly attribute barcodes to the appropriate products, pickings, locations, and more.
Adding barcodes to your products in Odoo makes inventory tasks faster and easier. Each product gets a unique barcode, so warehouse staff can quickly scan items instead of typing product names or codes. This helps reduce mistakes and saves time.
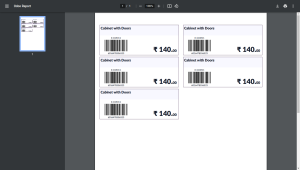
When a barcode is scanned, Odoo automatically finds the product and updates the quantity right away. You can also print barcode labels and stick them on your products for easy scanning.

Now your product is ready to be scanned during inventory operations.
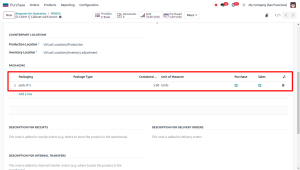
Packaging types are used to define how products are packed and handled in inventory and shipping operations. Each packaging can be associated with its own barcode, making warehouse operations faster and more accurate during picking, packing, and shipping.
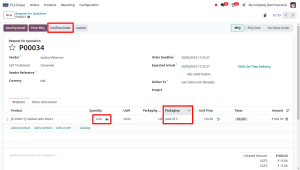
When creating a Purchase Order, you can specify the product packaging to indicate how the items will be delivered by the vendor. This is especially useful when products are delivered in bulk packaging like boxes, cartons, or pallets. After selecting the product in the order line, Odoo will automatically suggest the default packaging.
Follow these steps to select packaging on a purchase order:
In Odoo, you can scan packaging barcodes using the Barcode app to speed up warehouse operations. Scanning a packaging barcode automatically adds the total quantity of products in that package, so you don’t need to scan each item individually.This is especially useful during receipts, deliveries, and internal transfers. It helps save time and reduce errors. To use this feature, make sure each packaging has a barcode set up in the product form.

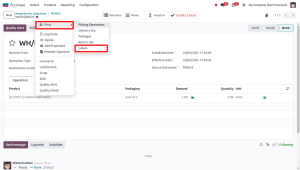
Odoo allows you to print barcodes for products directly from the system. This is useful for labeling items in your warehouse or store, making it easy to scan products during sales, inventory operations, and deliveries.
Follow these steps for print barcodes of the product:
Using barcodes in Odoo 18 is a smart way to make your inventory process faster, easier, and more accurate. With just a few steps, you can create barcode in Odoo, install the needed modules, enable the barcode feature, and add barcodes to your products. You can also print barcode labels and scan them for tasks like stock updates, deliveries, and more.
Barcodes help reduce human errors and save time by removing the need for manual data entry. Whether you run a small business or manage a big warehouse, creating barcodes in your Odoo system can make a big difference.
Try setting up barcodes in Odoo 18 today and see how it helps you work smarter!
Need help setting up barcodes or customizing Odoo? Contact us today for expert Odoo consultation and support!